
Range-Day Trauma: What Every Shooter Should Carry and How to Respond When Things Go Wrong
Quick Navigation: Guide Overview
Walk into any modern shooting range, and the rules of engagement are crystal clear. Before you even unlock your range bag, the Range Officer will ensure your eyes and ears are double-checked. Safety glasses? Check. Hearing protection with the right NRR rating? Check. We collectively accept these barriers against flying brass and concussive muzzle blasts as the non-negotiable cost of entry on the firing line. Yet, if you look down the line of benches, a glaring, high-risk omission becomes immediately obvious: while almost every shooter invests thousands in premium optics, firearms, and protection, the presence of a dedicated, life-saving range day trauma kit is routinely treated as a distant afterthought.
The baseline four rules of firearms safety are highly effective at preventing accidents, but they cannot absolute-proof human error or mechanical variance. When a rare but catastrophic malfunction occurs—be it a squib round leading to a catastrophic blowout, a high-velocity steel fragment ricochet, or a severe administrative holster bite—the cold reality sets in. A generic plastic first aid kit filled with character bandages, antiseptic wipes, and small gauze pads is completely useless against severe mechanical lacerations or ballistic trauma. On a live range, a medical emergency is a race against a stopwatch, not a calendar. Massive arterial bleeding can cause unconsciousness in less than 60 seconds and fatal exsanguination within three minutes.
True firearms responsibility doesn't stop at tight groupings; it extends to being medically capable of handling the damage a firearm can cause. This ultimate field guide dismantles the complacency of the firing line. We will break down the high-risk, low-frequency medical threats unique to shooting sports, map out the precise shooting range first aid gear you need in your range bag, and provide a clinical, step-by-step action plan to control the chaos when things go sideways.


The Anatomy of Range Accidents: High-Risk, Low-Frequency Threat Realities
The first step in true range preparedness is breaking through the "it won’t happen to me" mindset. Shooting ranges are highly controlled environments, which often induces a false sense of absolute security. However, when accidents occur on the firing line, they rarely involve minor scratches. Instead, they manifest as high-risk, low-frequency emergencies—complex traumas that combine kinetic energy, extreme heat, and sharp materials. To prepare your range day trauma kit effectively, you must understand the exact anatomy of the threats you are up against.
Ballistic Trauma Beyond Typical Gunshot Wounds
When most people think of shooting range first aid, they picture a direct, linear gunshot wound. While negligent discharges (NDs) do happen, ballistic trauma on a range often takes much more unpredictable paths.
Ricochets and Fragmentation: When a high-velocity projectile strikes a hardened steel target at an improper angle, or hits a rock embedded in an outdoor berm, it doesn’t always disintegrate safely. Pitted steel targets or poor backstop maintenance can send copper jackets and lead shrapnel flying backward down the firing line. These irregular fragments travel with enough rotational and kinetic energy to shred clothing, pierce skin, and sever superficial arteries, creating jagged, wide-track lacerations rather than clean entry punctures.
Negligent Discharges (NDs) during Transitions: Statistically, direct gunshot wounds on ranges rarely happen while a shooter is actively aiming at a target. Instead, they occur during administrative handling—specifically during the draw stroke from a holster, weapon transitions, or when clearing a complex malfunction. A finger slipping inside the trigger guard before reaching extension can result in a round tracking down the shooter’s own thigh or calf, threatening the femoral artery.
Non-Ballistic Mechanical and Thermal Injuries
The dangers of the firing line extend far beyond the muzzle. A significant portion of range-day trauma stems from severe mechanical and thermal failures that catch shooters completely off guard.
Catastrophic Weapon Failures ("KABOOM" Scenarios): A catastrophic failure occurs when the structural integrity of a firearm yields to extreme internal pressure. This is frequently caused by a "squib round"—a cartridge with insufficient powder that leaves a bullet lodged inside the barrel. If the shooter fails to recognize the distinct, muffled report and fires a subsequent round, the trapped gases will detonate the barrel or upper receiver. The result is an explosive shattering of polymer, steel, and aluminum. Shooters often sustain severe facial lacerations, deep shrapnel embedded in their hands and arms, and blast injuries that require immediate hemorrhage control.
Severe Thermal Burns: Modern firearms generate immense heat, which can quickly transition from an inconvenience to a medical emergency. A classic example is hot brass ejecting from a semi-automatic and deflecting down a shooter's shirt or collar. The sudden, searing pain often triggers a panic response, causing the shooter to drop or swing a loaded firearm while trying to dig the brass out. Furthermore, direct contact with blistering hot suppressors or barrels can instantly cause deep second- or third-degree thermal burns that destroy tissue and demand specialized burn management.
Slide Bite and Mechanical Lacerations: Heavy, sharp slide rails traveling backward under recoil can slice deep into the webbing of a shooter's hand if an improper grip is used. Sharp charging handles, rugged optic mounts, and stiff malfunction clearances also contribute to deep mechanical tears that bleed heavily due to increased blood flow from range adrenaline.
To maintain situational awareness on the line, every shooter should be aware of where these incidents are most likely to occur.
The Firing Line: The primary zone for hot brass burns, slide bite, and blast concussions.
The Holster Draw Transition: A high-risk zone for self-inflicted down-angle gunshot wounds to the lower extremities.
The Malfunction Clearing Phase: Where squib rounds are missed and improper hand placement leads to mechanical trauma.
The Cleaning Table: The main area for accidental discharges due to a failure to properly clear the chamber before disassembly.
The Down-Range Target Reset: High risk for fragmentation injuries if the line is not strictly cold or if steel targets are improperly angled.
Range Bag Anatomy: Medical Gear vs. Standard First Aid Kits
A dangerous misconception among many firearms enthusiasts is that any box with a red cross on it is sufficient for the firing line. They toss a generic, plastic utility first aid kit into their truck or range bag, check the mental box for safety, and never look at it again. This illusion of security can prove fatal. When a high-velocity piece of copper jacket slices an artery or a catastrophic failure shears a piece of steel into a hand, a box of adhesive strips and antiseptic wipes is essentially useless. To be truly prepared, you must understand the stark anatomical differences between standard first aid and dedicated tactical trauma care.
Why Your Generic First Aid Kit Will Fail on the Firing Line
Standard commercial first aid kits are designed for "comfort care." They are curated to treat minor domestic inconveniences: paper cuts, blistered heels, small splinters, and minor tension headaches. Consequently, they are packed with low-grade adhesive strips, small cloth tapes, sting relief wipes, and low-dose ibuprofen.
In sharp contrast, shooting range first aid requires "trauma care." Trauma care ignores minor scratches to focus exclusively on life-saving interventions that stabilize a patient until emergency medical services (EMS) arrive. Ballistic and severe mechanical injuries cause massive hemorrhages and compromised airways—emergencies where the patient's survival is measured in seconds. A standard flexible fabric bandage cannot generate the focal compression required to seal a ruptured vessel, nor can standard medical tape hold under the heavy sweat and blood associated with high-stress trauma. Relying on a generic kit on a live range is a fundamental mismatch of equipment to threat environment.
The Tiered Range Medical Setup: Micro EDC vs. Full IFAK
An effective range medical strategy does not rely on a single, massive bag sitting locked in the trunk of your car. If an accidental discharge occurs on the firing line, you cannot afford to run fifty yards back to your vehicle to retrieve your gear. True preparedness requires a tiered, layered system that balances immediate accessibility with comprehensive capability.
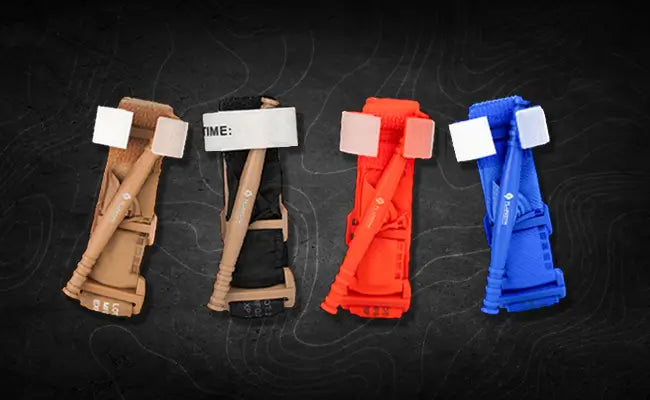
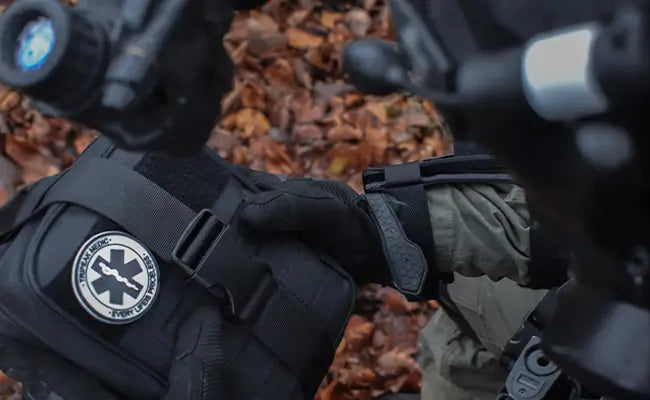
The "On-Body" Mandatory Tier: This is your immediate-response layer. It should consist of an ultra-compact, lightweight setup—such as a dedicated edc trauma pouch—mounted directly to your range belt, competition rig, or even kept in a cargo pocket. This tier must be accessible with either hand in under three feet of movement. Its primary purpose is to house the absolute essentials needed to stop catastrophic bleeding instantly: a high-quality windlass tourniquet and a pack of compressed gauze. Keeping this on your body ensures that even if you are knocked to the ground or separated from your primary gear, your lifelines remain with you.
The "Range Bag" Anchor Tier: This is your secondary, comprehensive layer. Kept inside or securely strapped to the exterior of your main range backpack, this is a full-scale Individual First Aid Kit (IFAK). The anchor tier expands on your on-body kit, containing advanced medical supplies to treat penetrating torso trauma (sucking chest wounds), multiple severe lacerations, and environmental or thermal emergencies. It provides the depth of supplies required if an accident involves multiple victims or a complex, prolonged rescue scenario.
To help you audit your current setup, the matrix below highlights the practical differences between these two worlds and outlines exactly what a dedicated range day trauma kit brings to the fight.
| Medical Item / Emergency | Generic First Aid Kit (Box) | Dedicated Range Trauma Kit (IFAK) | Critical Function on the Range |
| Massive Arterial Bleeding | ❌ Gauze pads / Tiny bandages | Rugged Windlass Tourniquet | Stops catastrophic extremity exsanguination within 30 seconds. |
| Ballistic Puncture (Gunshot) | ❌ Standard cloth tape | Kaolin/Chitosan Hemostatic Gauze | Packs deep track wounds to clot blood where tourniquets can't reach. |
| Open Chest Wound (Sucking) | ❌ Plastic wrap & medical tape | Vented Chest Seals (Twin Pack) | Prevents tension pneumothorax (collapsed lung) from torso punctures. |
| Severe Shrapnel Laceration | ❌ Small adhesive strips | 4-Inch / 6-Inch Emergency Bandage | Applies high-pressure focal compression to wide, irregular wounds. |
| Minor Burns / Cuts | Antiseptic & Band-aids | ❌ (Usually absent or minimal) | Basic comfort care for hot brass or slide bites; non-life-threatening. |
The Range Day Trauma Checklist: Critical Lifesaving Components
When configuring a range day trauma kit, every single component must earn its place based on its ability to preserve human life during the critical window before advanced medical care arrives. On a live firing line, this selection is governed by the principles of tactical combat casualty care, adapted for civilian sport and defense shooters. If a component cannot directly counter blood loss, airway obstruction, or thoracic collapse, it belongs in a secondary utility kit—not your primary trauma setup. Below is the breakdown of the non-negotiable medical tools required in a dedicated shooting range IFAK.
Massive Hemorrhage Control: The Golden Minute
Arterial bleeding from a ballistic puncture or structural weapon failure is the leading cause of preventable death on the range. Controlling this bleeding requires heavy-duty tools designed for extreme mechanical pressure.
Rugged Windlass Tourniquets: The primary tool for severe extremity hemorrhage is a generation-certified windlass tourniquet, such as a CoT (Committee on Tactical Combat Casualty Care) approved model. The windlass mechanism applies massive circumferential pressure to completely occlude arterial blood flow in a limb. A critical warning for all shooters: never purchase life-saving tourniquets from unverified discount online retailers or Amazon third-party sellers. Cheap, counterfeit tourniquets feature plastic windlasses that consistently snap under the immense pressure required to stop a real arterial bleed. Stick to verified, professional-grade tactical gear.
Hemostatic Agents and Clotting Gauze: Tourniquets are highly effective for arms and legs, but they cannot be applied to junctional areas like the groin, armpits, or neck. If an accidental discharge strikes a shooter high in the thigh or hip, the only viable solution is wound packing using advanced hemostatic gauze. Modern clotting agents infused with Kaolin or Chitosan work independently of the body's natural clotting cascade. When packed tightly into a deep wound track, they chemically react to form an instant, robust plug, sealing the ruptured vessel directly at the source.
Modular Pressure Dressings: Once a wound is packed with hemostatic gauze, that packaging must be held under constant, high-volume focal compression. A modular trauma bandage (often referred to as an Israeli Bandage) features a built-in pressure bar that allows the user to wrap the elastic bandage over the wound site, hook it through the bar, and pull it back tightly to exert continuous direct downward force.
Airway and Respiration: Managing Penetrating Torso Trauma
A bullet or flying piece of sharp shrapnel that strikes the torso presents an immediate threat to the respiratory system. The lungs operate within a delicate sealed vacuum inside the thoracic cavity.
Vented Chest Seals: When a projectile punctures the chest, back, or shoulder, atmospheric air rushes into the chest cavity through the new hole. This destroys the natural vacuum, causing a condition known as a "sucking chest wound." As air builds up outside the lung, it creates a tension pneumothorax, which rapidly collapses the lung and puts fatal pressure on the heart. A high-quality vented chest seal uses a medical-grade hydrogel adhesive that sticks firmly through thick blood, sweat, and body hair. The built-in one-way valves are crucial: they allow trapped air and blood to escape from the thoracic cavity while preventing outside air from entering, keeping the lung inflated. Always carry a twin-pack, as bullets that enter the torso frequently exit through the back.
Environmental, Thermal, and Visual Protection
Hypothermia Prevention: One of the most overlooked components of trauma care is managing body temperature. Significant blood loss destroys the body's ability to regulate heat, leading to the "lethal triad" of trauma (Hypothermia, Acidosis, and Coagulopathy). Once a patient's temperature drops, their blood loses its ability to clot, drastically accelerating blood loss. A ultra-compact Mylar emergency blanket is a mandatory addition to any range kit, even when shooting in hot, mid-summer conditions.
To ensure your setup is truly complete, use the following scannable checklist to audit your range bag before your next live-fire session:
CoT-Approved Windlass Tourniquet (with Rapid-Access Sleeve): Stored prominently on the exterior of your gear, never buried.
Advanced Hemostatic Packing Gauze: Infused with Kaolin or Chitosan for junctional packing.
Vented Chest Seals (Twin-Pack): To treat both the entry and exit puncture wounds on the torso.
4-Inch or 6-Inch Emergency Trauma Dressing: For heavy mechanical pressure over packed wounds.
Heavy-Duty Trauma Shears: Essential for slicing through thick range clothing, leather gun belts, or heavy canvas to expose the injury site.
Premium Nitrile Gloves (Multiple Pairs): Heavy-gauge, non-latex protection to shield you from bloodborne pathogens while working under stress.
The Firing Line Emergency Action Plan: Step-by-Step Response Protocol
Having the ultimate range day trauma kit tucked into your backpack is only half the battle. When a loud, irregular report is immediately followed by a scream of agony on a live firing line, panic is your primary enemy. Under the rush of adrenaline, your fine motor skills degrade significantly, and coherent decision-making collapses. To save a life, you must rely on a rehearsed, clinical, and step-by-step emergency action plan. On a shooting range, medical response carries a unique burden: you must manage lethal firearms and a chaotic environment before you can safely treat the patient.
Phase 1: Securing the Line and Eliminating the Threat
In standard civilian first aid, the initial rule is always to "assess the scene for safety." On a shooting range, this step requires an active, commanding intervention. The immediate danger is not just the injury itself—it is the fact that a wounded shooter may still be holding a loaded, chambered firearm while entering a state of profound shock.
The absolute first action any witness must take is to scream "CEASE FIRE! CEASE FIRE! CEASE FIRE!" at the top of their lungs. Do not whisper it; command the range. Every single shooter down the line must echo the command, immediately stop shooting, bench their firearms, clear their chambers, show an open breech, and holster or step back from their benches. You cannot safely provide medical care if someone down the line continues to fire, or if the victim is spinning around with a loaded weapon in their hand. If the victim is still holding a firearm, a designated safety officer or the nearest capable shooter must safely secure, clear, and render that weapon safe before anyone touches the wound.
Phase 2: Applying the Civilian M.A.R.C.H. Protocol Under Range Conditions
Once the firing line is completely cold and all weapons are verified safe, you must immediately transition to patient care. Do not guess what to do next; follow the clinical, structured steps of the M.A.R.C.H. protocol, which prioritizes injuries by what will kill the patient fastest.
M - Massive Bleeding: Inspect the patient immediately for high-volume blood loss. If you see bright red, spurting, or pooling blood on a limb, deploy your windlass tourniquet instantly. Apply it high and tight on the injured extremity, directly over the clothing if necessary, and crank the windlass until the bleeding stops and the distal pulse vanishes. If the bleed is in a junctional area like the hip or armpit, rip open your hemostatic gauze and pack the wound track tightly with continuous downward finger pressure for at least three minutes. Note the exact time ($T$) of tourniquet application directly on the device.
A - Airway: Ensure the patient is conscious and breathing. If they are unconscious, check their airway for obstructions (such as blood or teeth from a face-shattering weapon blowout) and place them in the recovery position or utilize a head-tilt/chin-lift to keep their airway open.
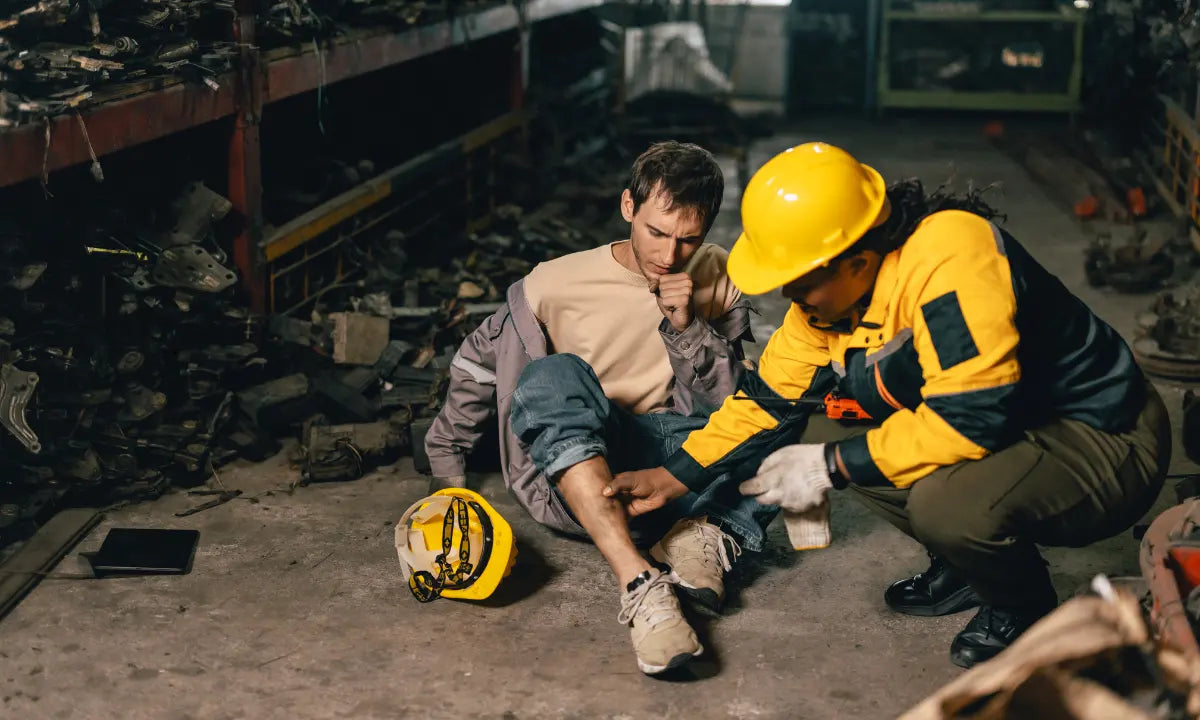
R - Respiration: Expose the torso by using your heavy-duty trauma shears to cut away heavy range shirts or jackets. Look and feel for penetrating wounds from bullets or flying shrapnel. If you locate a puncture, slap a vented chest seal directly over it. Remember to logistically check the patient's back for a corresponding exit wound and seal that as well.
C - Circulation: Reassess your bleeding control. Is the tourniquet holding? Is the pressure dressing secure? Check the patient's overall pulse quality and skin color.
H - Hypothermia / Head: Immediately wrap the patient in a Mylar emergency blanket. Even if it is a hot summer afternoon, substantial blood loss will cause the patient's core temperature to plunge, destroying their blood's ability to clot naturally.
Phase 3: Range Communications and Triage Logistics
While the primary medic is executing the M.A.R.C.H. protocol, secondary shooters must coordinate emergency communications. This is a critical vulnerability for remote outdoor ranges or indoor clubs with heavy, magnetic security doors where EMS cannot easily enter.
Assign one specific individual to call 911. Do not shout "someone call 911"—point directly at a person and command them. Assign a second individual to run directly to the main gate or property entrance to wait for the ambulance, unlock any security padlocks, and guide the paramedics straight to the specific bay or firing line.
Emergency Call Script for Range Accidents
When communicating with emergency dispatchers, the designated caller should state the following details clearly and concisely without panic:
Exact Location: "We are at [Range Name], located at [Street Address/GPS Coordinates], specifically at Bay number [X]."
The Incident: "We have a [Gunshot Wound / Shrapnel Injury / Blast Injury] to the [Limb/Torso]."
Current Status: "The firing line is secure. The patient is conscious/unconscious, and we have applied a [Tourniquet / Chest Seal] at [Time]."
Logistics: "A guide is waiting at the main entrance to bring paramedics directly to our position."
Range-Specific Medical Drills: Training Your Mind to Match Your Gear
Investing in a premium range day trauma kit and learning the steps of the M.A.R.C.H. protocol are essential steps, but they are only step one. The hard truth of emergency medicine is that gear does not save lives—the application of gear saves lives. Under the extreme cognitive load of a real-world emergency, your body undergoes a massive physiological shift. Heart rate spikes, tunnel vision sets in, and fine motor skills degrade by up to 70%. If you have to read the instructions on your trauma bandage or fumble around trying to open a zippered pouch while your hands are covered in sweat and blood, you are losing valuable time. To bridge this gap, you must actively build deep muscle memory through deliberate, range-specific medical drills.
The Muscle Memory Gap: Why Buying Gear is Only Step One
Many shooters suffer from a dangerous cognitive bias: they assume that because a piece of high-end equipment is sitting inside their backpack, they automatically possess the capability to use it under duress. Medical gear is often kept pristine, sealed in factory plastic, and buried deep inside a range bag beneath boxes of ammunition and cleaning kits.
If an accident occurs on the firing line, you will not have the cognitive clarity to execute complex problem-solving. Your brain relies entirely on subconscious neural pathways—what we commonly call muscle memory. If you haven't physically pulled a tourniquet from its holster, unraveled it, and locked it down on an arm or leg dozens of times against a timer, you will fail when a real life hangs in the balance.
Tactical Range Drills to Incorporate into Your Shooting Routine
You do not need a separate training day to build medical proficiency. You can seamlessly integrate simple, high-impact trauma drills directly into your regular live-fire or dry-fire shooting sessions.
The "Support Hand Only" Tourniquet Drill: This drill simulates a catastrophic weapon failure or gunshot wound that completely disables your dominant arm. Set a shot timer to a random start delay. Keep a designated training tourniquet staged exactly how you carry it on your belt or in your edc trauma pouch. At the buzzer, you must deploy the tourniquet, wrap it high and tight around your dominant arm, pull the strap completely flush, and lock the windlass down using only your non-dominant support hand. A passing standard for a prepared shooter is securing the tourniquet to a complete stop in under 30 seconds.
The Blind Deployment Drill: In a low-light environment or an indoor range filled with smoke and dust from a weapon blowout, you may not be able to clearly see your medical gear. Sit at your shooting bench with your eyes completely closed. Have a training partner give the command "Bleeding Left Leg!" Without opening your eyes, you must navigate your range bag or belt rig, locate your trauma shears and gauze, and simulate deploying them to the correct location by feel alone. This builds an intuitive spatial awareness of your gear setup.
The Stress-Induced Application Drill: Immediately following a high-intensity shooting stage—such as a multi-target movement drill that naturally elevates your heart rate to 130+ beats per minute—have an instructor or training partner yell "TRAUMA!" You must immediately holster your safe, cleared weapon, drop to one knee, and correctly apply a pressure dressing or a training tourniquet to yourself or a simulated casualty while actively managing physical fatigue and heavy breathing.
Storing and Maintaining Your Range Gear
The environment inside a shooting range bag is incredibly harsh. Over months of regular use, your medical gear is constantly exposed to loose carbon fouling, abrasive unburnt gunpowder, corrosive gun oils, solvents, sharp metal feed lips on magazines, and intense UV exposure if training outdoors.
Never leave life-saving medical gear exposed to these elements. Fine grit can embed itself into the hook-and-loop velcro of a tourniquet, causing it to fail and unpeel when under mechanical pressure. Gun solvents can degrade the sterile packaging of hemostatic gauze or weaken the hydrogel adhesive on chest seals. Ensure your primary trauma gear is housed inside a dedicated protective enclosure—such as a rugged nylon pouch with a specialized rapid-deploy sleeve. This keeps the elements out while ensuring the gear can still be pulled free with a single motion when seconds count.
Conclusion
Being a responsible firearm owner is a comprehensive commitment. It requires far more than mastering the mechanics of a trigger press, tracking split times on a shot timer, or maintaining tight groupings on a paper target down-range. True proficiency on the firing line is defined by your ability to manage every single variable that can occur within that high-energy environment—and that includes handling the catastrophic, tissue-destructive damage that a firearm is capable of causing. To step up to a firing line with a lethal weapon while lacking the medical means to patch a ballistic wound is a profound failure in basic range safety and preparedness.
Accidents are not scheduled events. When a structural weapon blowout occurs, or a jagged piece of steel shrapnel deflects off a target backdrop, the line between a close call and a fatal tragedy depends entirely on what gear is within arm's reach and whether you have the muscle memory to deploy it without hesitation.
Before you pack your bags for your next live-fire session, conduct a rigorous medical audit of your setup. Unzip your range bag, clear out the expired utility bandages and generic plastic first aid boxes, and evaluate your true readiness. Ensure you are equipped with professional-grade, purpose-built tactical solutions designed to withstand real-world friction. Explore FlareSyn’s specialized tactical trauma kits and rapid-deploy pouches today, stage your life-saving gear where it can be reached in seconds, and ensure that you are fully prepared to control the chaos and save a life when things go wrong.
Can I use a regular military surplus IFAK for my range day trauma kit?
Yes, a military surplus Individual First Aid Kit (IFAK) is highly effective because it is already prioritized around hemorrhage control and penetrating trauma. However, ensure that all the components within that surplus kit—especially the tourniquet and chest seals—are not expired, degraded by UV rays, or counterfeit. Many shooters prefer upgrading to a modern, streamlined system like a FlareSyn compact pouch to save precious space in their range bag.
Where is the best place to mount my medical pouch on a range belt?
Your primary tourniquet and rapid-access trauma items should always be mounted in a centralized position that is easily reachable by both your dominant and non-dominant hands. The most common and effective location is at the small of the back (the 6 o’clock position) on your range belt, or mounted directly to the front centerline of a plate carrier. Avoid placing it deep inside pockets where a broken or trapped arm would prevent you from reaching it.
How often should I replace the components inside my shooting range first aid kit?
As a general rule of thumb, you should inspect your trauma gear every 6 months and completely replace items based on factory expiration dates. While tourniquets do not have strict expiration dates, the elastic components of trauma bandages and the hydrogel adhesive on vented chest seals typically have a shelf life of 3 to 5 years. Furthermore, if your kit is constantly exposed to extreme trunk heat, gun oil, or loose carbon residue inside your range bag, check them more frequently for packaging seal failures.
Are training tourniquets different from the ones I should use in a real emergency?
Absolutely. You should always maintain a strict separation between your "Training TQ" and your "Duty/Live TQ." Training tourniquets are subjected to repeated friction, stretching, and locking cycles during drills, which introduces microscopic stress fractures into the plastic windlass and degrades the velcro. Keep your live range day trauma kit sealed and pristine, and clearly mark your training device with blue tape or a paint marker so they are never mixed up when seconds count.


Elias.H.Hwang
Elias H. Hwang is a tactical medicine expert and lead contributor at FlareSyn. He specializes in emergency trauma protocols and preparedness education, helping civilians and professionals alike master the tools and skills needed to save lives in critical moments.

Laisser un commentaire
Ce site est protégé par hCaptcha, et la Politique de confidentialité et les Conditions de service de hCaptcha s’appliquent.