
Wilderness Fracture Management: When Help is Hours Away
Accidents happen, and when you are in the backcountry or remote wilderness, even a simple fracture can become a serious threat if help is not immediately available. Whether you are hiking, camping, or working in remote areas, understanding how to stabilize fractures, control bleeding, manage pain, and prevent secondary injury can make the difference between a safe evacuation and a worsening medical emergency. This guide will provide a comprehensive approach to wilderness fracture management, covering essential protocols, improvised techniques, and equipment, including SAM splints, triangular bandages, and trekking poles, to ensure you are prepared when professional care is hours away.
Scene Size-Up and Patient Evaluation
The first step in wilderness fracture management is a thorough scene size-up. Ensure your safety and the safety of your group before approaching the injured person. Evaluate potential hazards such as unstable terrain, falling rocks, or environmental threats like extreme heat or cold. Once the scene is secure, conduct a primary patient evaluation. This includes observing the Mechanism of Injury (MOI) to understand how the injury occurred. falls, overexertion, or impacts with objects—and the Nature of Injury (NOI), which considers whether you are dealing with a fracture, dislocation, sprain, or open wound. Inventory all available tools and equipment, from backpacks and jackets to trekking poles, sleeping pads, or FlareSyn SAM splints, to determine how to improvise a safe splint or immobilization device. Always adhere to the “don’t create a second patient” rule: prioritize safety and avoid actions that could put rescuers at risk while assisting the injured person.
Fracture Identification in Remote Settings
Fractures in the wilderness are not always obvious, and recognizing them quickly is crucial for preventing further damage. Common signs include deformity, swelling, bruising, limited range of motion, and severe tenderness. In long bone fractures, patients may be unable to bear weight or use the limb without excruciating pain. Joint fractures or dislocations may present with visible misalignment or abnormal mobility. Even when the injury is subtle, it is safer to treat suspected fractures as true fractures until confirmed by professional evaluation. Auditory cues like a “pop” or grinding sensation, or a visible protrusion of bone in open fractures, are clear indicators requiring immediate immobilization and evacuation.
Basic Fracture Management Principles
Once a fracture is suspected, initial care should focus on immobilizing the injured part, reducing pain, and preventing further injury. Immobilization should include joints above and below the fracture, ensuring the limb does not move during transport. Keep soft tissue protected with padding, which can be improvised from sleeping pads, jackets, or clothing. Monitor circulation, sensation, and movement (CSM) before and after immobilization to detect any compromise in blood flow or nerve function. When available, FlareSyn splints provide superior stability and can be molded to the injured limb, conforming to the extremity while maintaining anatomical alignment. Improvised splints using sticks, trekking poles, paddles, or aluminum stays may be necessary in extreme scenarios, secured with belts, boot laces, duct tape, or elastic wraps.
Splinting Techniques and Materials
1. Upper Extremity Splints
Upper extremity fractures, including fingers, wrists, forearms, elbows, and shoulders, require careful stabilization to preserve function and prevent further injury. For finger fractures, buddy taping or a small FlareSyn SAM finger splint can immobilize individual digits while maintaining circulation. For the wrist and forearm, sugar-tong splints created from SAM splints or trekking poles restrict forearm rotation and limit wrist movement, reducing pain and swelling. Thumb injuries benefit from a thumb spica configuration, which stabilizes scaphoid fractures, thumb dislocations, and ulnar collateral ligament injuries.
Elbow fractures and dislocations should be splinted in the position found unless gentle traction is necessary to maintain anatomical alignment. For upper arm and shoulder injuries, a sling and swathe combined with a molded SAM splint supports the humerus and reduces motion during transport. Padding along the ulnar side of the arm and at bony prominences ensures skin protection and patient comfort during extended evacuations. Frequent CSM (Circulation, Sensation, Movement) checks are essential to avoid vascular compromise or nerve injury during transport.
2. Lower Extremity Splints
Lower extremity fractures, including injuries to the ankle, tibia, fibula, knee, patella, and femur, often involve weight-bearing challenges. Ankle and foot fractures can be immobilized using a figure-8 or stirrup splint, constructed from a SAM splint or trekking poles. Padding with jackets, sleeping pads, or clothing helps protect soft tissue from pressure sores. Tibia and fibula fractures require long-leg stabilization with dual-splint configurations to restrict movement above and below the fracture. Knee injuries may be supported with T-curve SAM splints, maintaining joint alignment and minimizing ligament stress.
Femur fractures are serious and require Reverse C-Curve or T-Curve SAM splints for maximum support during transport. Pain and potential shock require monitoring and careful handling. Elevating the limb when possible reduces swelling, while continuous PMS checks detect any deterioration in circulation or sensation. In severe cases, improvised sleds, stretchers, or harness systems can help transport patients safely to medical facilities.
3. Open Fractures and Traction in Position (TIP)
For open fractures or severe deformities, apply gentle traction in position (TIP) to realign the limb carefully while avoiding excessive movement. Cover the wound with a clean, sterile dressing before applying the splint. Multi-sided splints, padded appropriately, provide maximum stability in situations where evacuation may take hours. Continuously monitor for swelling or changes in CSM, adjusting padding and tension as needed.
RICE and Pain Management in Wilderness Settings
In addition to immobilization, managing swelling and pain is essential. Applying Rest, Ice, Compression, and Elevation (RICE) where feasible can limit tissue damage. Use natural resources such as snow, cold water, or wet clothing for icing. Keep the injured limb elevated on a sleeping pad or backpack when possible. Pain may also be reduced by maintaining the limb in a functional position, using slings or swathes. When available, NSAIDs or acetaminophen can provide temporary relief, but the priority remains safe immobilization and preparation for evacuation.
Advanced SAM Splint Applications in Wilderness Scenarios
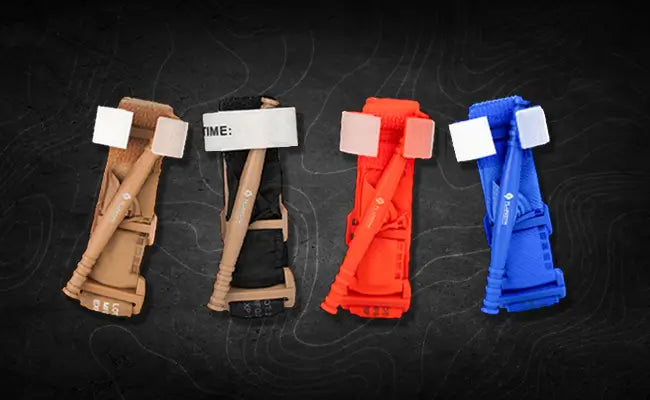
When professional help is hours away, using a splint from FlareSyn ensures reliable and durable fracture stabilization in the field. The SAM splint is versatile and can be molded into C-Curve, Reverse C-Curve, or T-Curve configurations, adapting to both upper and lower extremities. For long bones such as the tibia, fibula, or femur, a T-Curve or Reverse C-Curve provides maximum rigidity, while for fingers or forearms, a simple C-Curve offers sufficient immobilization. Properly shaped SAM splints reduce movement at the fracture site, protect soft tissue, and maintain distal circulation and nerve function.
In wilderness environments, SAM splints can be paired with triangular bandages, FlareSyn elastic wraps, or duct tape to secure the splint in place. Improvised padding using jackets, sleeping pads, or backpacks ensures patient comfort and prevents skin damage during prolonged transport. For upper extremities, a sugar-tong or thumb spica configuration stabilizes the wrist, forearm, and thumb, while for lower extremities, figure-8 or stirrup techniques help immobilize the ankle and foot. Using these techniques ensures that the injured person can safely self-evacuate or be transported by the group without causing secondary injuries.
Step-by-Step Immobilization Workflow
A structured approach to wilderness fracture management is crucial for safety and efficiency. Begin with a scene size-up, evaluating hazards and resources. Conduct a primary patient evaluation, focusing on MOI (Mechanism of Injury), NOI (Nature of Injury), and neurovascular assessment. Establish baseline Pulse, Motor, Sensory (PMS) values for the injured extremity. Gather all available materials: SAM splints, trekking poles, sleeping pads, triangular bandages, handkerchiefs, belts, ropes, or duct tape.
Next, prepare the injury site by controlling bleeding, applying sterile dressings if needed, and padding bony prominences. Shape the SAM splint according to the injury location: C-Curve for fingers/forearms, Reverse C for long bones, T-Curve for femur or knee stabilization. Apply the splint to immobilize the fracture while maintaining anatomical alignment. Secure with elastic wraps or improvised bindings, starting distal to proximal. Finally, reassess circulation, sensation, and movement (PMS) to ensure no compromise has occurred, making adjustments as needed.
Neurovascular Assessment and PMS Checks
Maintaining neurovascular integrity is vital during field fracture care. After splinting, monitor distal pulse, skin color, temperature, sensation, and motor function. Any signs of numbness, tingling, pallor, or cold extremities indicate compression or vascular compromise and require immediate adjustment of the splint or wrapping. Frequent checks throughout transport are especially important when evacuation may take several hours. This ensures the splint is effective without causing secondary injury such as compartment syndrome or nerve damage.
Improvised Splints and Creative Stabilization Techniques
In backcountry settings, standard splints may not always be available. Improvised materials like tree branches, ski or canoe poles, aluminum stays, paddles, or sturdy cardboard can be used to stabilize fractures. Padding with sleeping bags, jackets, or clothing is critical to prevent soft tissue damage. Even in these improvised setups, the same principles apply: immobilize joints above and below the fracture, maintain anatomical alignment, and continuously monitor PMS. SAM splints remain the preferred option, but improvisation ensures injury stabilization until professional care is reached.
Prolonged Field Care and Delayed Evacuation Considerations
When help is hours or even days away, fractures require continuous monitoring and care. Check for increasing swelling, changes in PMS, or signs of skin compromise. Re-adjust padding and splints to maintain immobilization without compromising circulation. Open fractures require sterile coverings, and improvised traction may help realign bone ends if severe deformity exists. Elevate the limb when possible and apply ice or cold compresses using snow, water, or a wet cloth to reduce swelling and pain. Document the injury and care steps, ensuring clarity for rescue teams upon arrival.
Evacuation Planning and Safety
Even with proper immobilization, evacuation planning is essential. Minor fractures may allow self-evacuation, but serious injuries or worsening neurovascular status require calling Search and Rescue (SAR) or using improvised transport methods, such as a sled, stretcher, or harness system. Protect the injury during transport, maintain splint integrity, and ensure the patient remains warm and hydrated. In prolonged evacuations, maintain vigilance over PMS and adjust the splint as swelling changes. FlareSyn SAM splints’ durability and waterproof design make them ideal for maintaining stability during extended transport.
Summary and Takeaways
Wilderness fracture management is a skill that combines medical knowledge, improvisation, and proper equipment use. Key principles include:
-
Scene safety and patient assessment: MOI, NOI, and resource inventory.
-
Neurovascular checks: Continuous PMS monitoring throughout care and transport.
-
Splinting: Use SAM splints or improvised materials, immobilize joints above and below, pad bony prominences.
-
Pain and swelling management: Apply RICE method when possible and maintain functional limb positioning.
-
Evacuation readiness: Stabilize, monitor, and transport safely using available tools and SAR coordination.
Using FlareSyn splints, elastic wraps, trauma shears, and first aid kits, responders can provide reliable fracture stabilization, reduce pain and further injury, and increase the safety and confidence of wilderness evacuation. Mastery of these techniques ensures that even when professional help is hours away, the patient’s limb and overall condition are preserved until definitive care is reached.

