
SAM Splint Application: Techniques for Every Fracture Type
In emergencies, properly immobilizing fractures and soft tissue injuries can be the difference between a smooth recovery and long-term complications. The SAM splint, a versatile and lightweight splint, allows first responders, tactical teams, and workplace safety personnel to stabilize injuries quickly and effectively. This guide will help you understand the principles of splinting, learn how to apply SAM splints for different fractures, and ensure neurovascular integrity is maintained throughout treatment. Whether you’re managing a hand fracture on a construction site, an ankle injury during sports, or a forearm injury in the field, knowing the right techniques ensures both safety and efficiency.
Understanding SAM Splints and Their Advantages
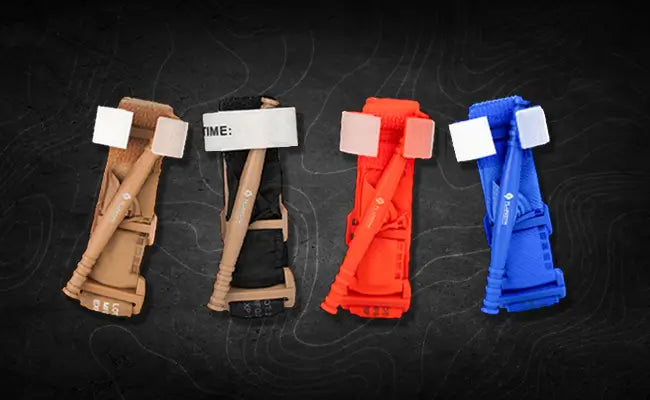
The SAM splint is made from 1100-O temper aluminum sandwiched between closed-cell foam layers, making it lightweight, waterproof, and radiolucent for X-ray imaging. Its design allows it to be curved, folded, and molded to the patient’s anatomy without losing structural integrity. This flexibility enables C-Curve, Reverse C-Curve, T-Curve, and custom configurations for different fractures and body areas, from fingers to femurs. SAM splints are also reusable, easy to disinfect, and durable across a wide temperature range, which makes them ideal for emergency response, workplace first aid, and tactical applications.
Using a splint from FlareSyn ensures consistent quality, ergonomic design, and integration with your IFAK (Individual First Aid Kit), allowing for rapid deployment in real-world situations. The closed-cell foam prevents skin irritation and pressure sores, while the aluminum core provides rigid support to effectively immobilize fractures.
General Principles of Splinting
Before applying a SAM splint, it’s essential to follow core splinting principles:
-
Visualize the Injured Body Part: Assess deformities, swelling, and open wounds before splinting.
-
Continually Recheck Neurovascular Status: Monitor distal pulses, motor function, and sensation to ensure adequate circulation.
-
Traction if Necessary: If the pulse is absent, apply gentle traction (<10 lbs) to restore alignment temporarily.
-
Cover Open Wounds with Sterile Dressing: Prevent contamination before applying the splint.
-
Immobilize Joints Above and Below the Injury: Proper immobilization limits movement and reduces pain.
-
Use Padding to Prevent Skin Damage: Soft foam or gauze over bony prominences protects the skin.
-
Do Not Reset Open or Protruding Fractures: Splint in the position found to avoid further injury.
-
Splint Before Transport if Stable: Ensure stability during movement or evacuation.
-
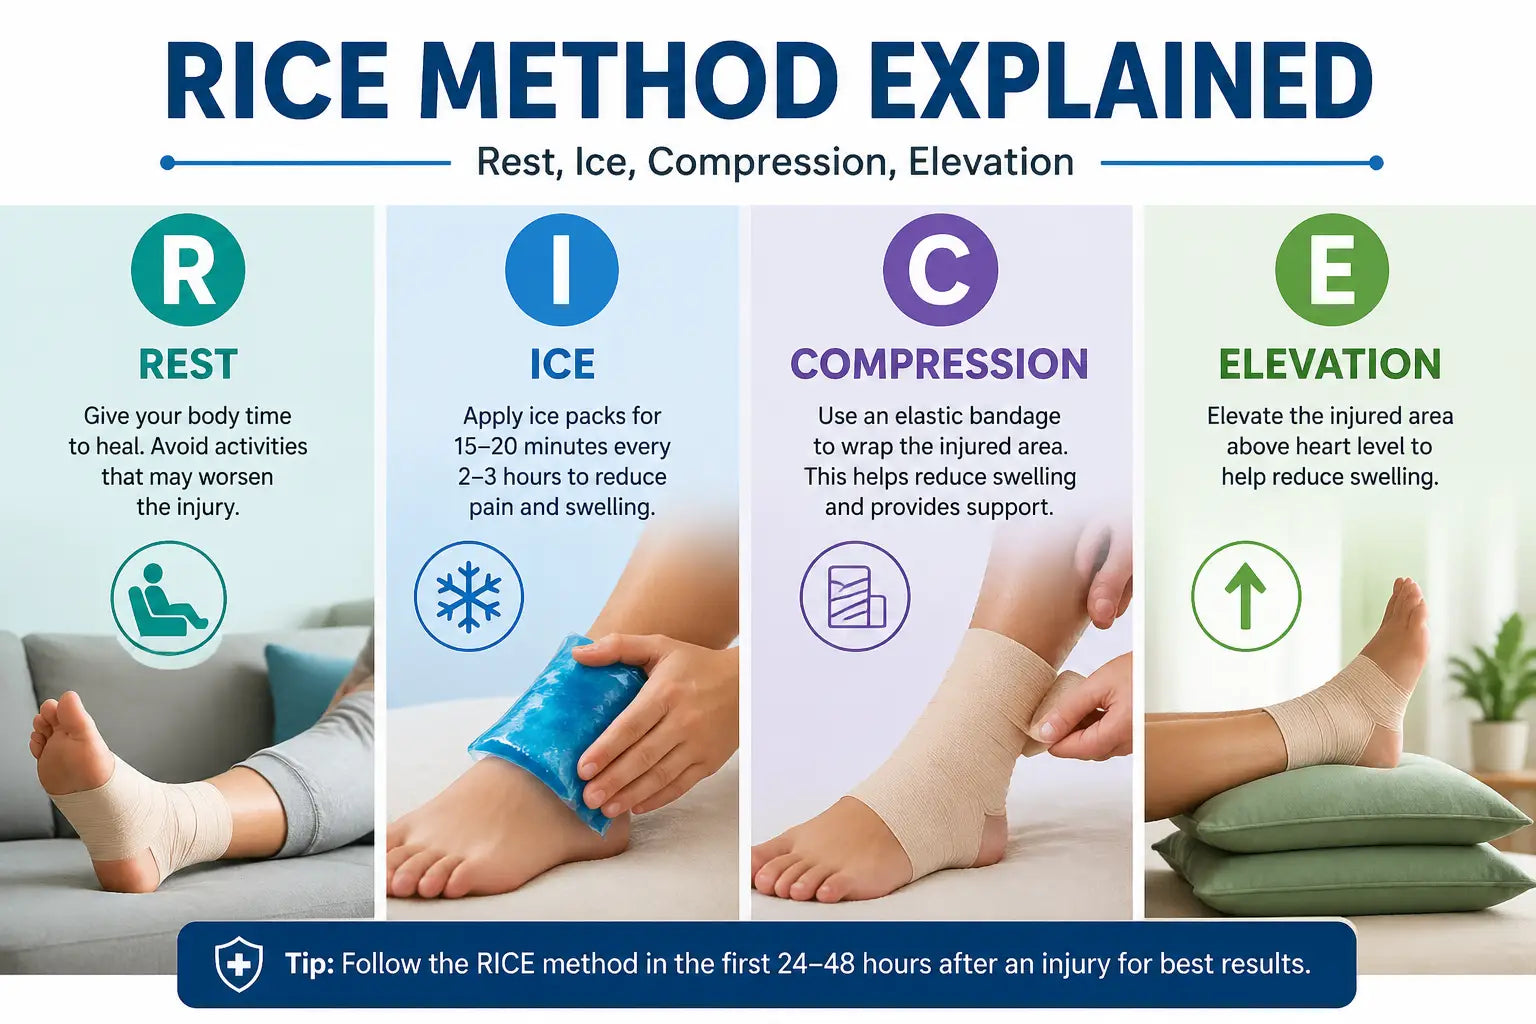
Ice and Elevate Post-Splinting: Apply as needed to reduce swelling and discomfort.
These principles create a foundation for safe fracture care and are the first step before advanced SAM splint techniques.
Types of Splints and Applications
1. Rigid Splints
Rigid splints provide strong support for unstable fractures and can include aluminum-based SAM splints. They require padding and secure wrapping with wraps to prevent pressure injuries. Rigid splints are ideal for long bones, humerus, forearm, or tibia fractures.
2. Soft Splints
Soft splints like slings, padded swathes, or pillows are suitable for shoulder, clavicle, upper arm, and elbow injuries. When paired with a SAM splint , these soft supports stabilize injuries without compromising mobility or causing discomfort.
3. Improvised Splints
In the absence of standard equipment, improvised materials (blankets, clothing, sticks) can stabilize fractures temporarily. While effective in urgent situations, SAM splints provide predictable rigidity and better protection, ensuring optimal immobilization without relying on makeshift materials.
Upper Extremity SAM Splint Applications
1. Finger and Hand Injuries
For finger fractures, especially on the ulnar (little finger) side of the hand, finger splints can be molded to provide full support. Buddy splinting is possible for multiple digits. For thumb injuries, a thumb spica configuration stabilizes scaphoid fractures, dislocations, and ulnar collateral ligament injuries.
2. Wrist and Forearm Fractures
Sugar-tong splints made from SAM splints immobilize forearm, wrist, and distal elbow fractures. Proper alignment in a neutral or slightly functional position ensures protection while allowing circulation. Elastic wraps from secure the splint without compressing soft tissue.
3. Elbow and Humerus Injuries
For elbow fractures or dislocations, the triangle or U-shaped SAM splint configuration maintains flexion and prevents extension that could worsen injury. Humeral shaft fractures can be supported with a combination of a sling, swathe, and molded SAM splint to control pain and limit movement.
Lower Extremity SAM Splint Applications
Ankle and Foot
Use a stirrup or figure-8 SAM splint to stabilize ankle fractures or sprains. Proper padding prevents pressure sores, and elevation reduces swelling during transport.
Tibia and Fibula
For leg fractures, long-leg SAM splints provide rigid support. Dual-splint application ensures the tibia and fibula are immobilized while maintaining distal pulse checks.
Knee and Patella
A T-Curve SAM splint can support the patella and ligaments, especially for dislocations or tendon injuries. Ensure straps or wraps do not impede distal circulation.
Femur Fractures
Reverse C or T-Curve configurations provide maximal support for femur fractures, particularly in pre-hospital or tactical settings. SAM splints’ lightweight design allows for efficient immobilization and transport without adding bulk.
Step-by-Step SAM Splint Application Workflow
Proper application of a SAM splint ensures effective immobilization and prevents further injury. The workflow begins with a comprehensive assessment of the injury. Assess the scene for safety and evaluate the mechanism of injury, visible deformity, swelling, and any open wounds. Conduct a baseline neurovascular assessment—checking Pulse, Motor, Sensory (PMS) distal to the injury. Document the patient’s sensation, movement, and distal pulse before applying any splint. This establishes a reference to identify changes after immobilization.
Once assessment is complete, prepare the injury site. Cover any open wounds with sterile dressing to prevent contamination, and pad bony prominences and soft tissue areas using gauze or foam from FlareSyn kits. Proper padding reduces the risk of skin irritation, pressure sores, or soft tissue injury under the splint.
Next, select the appropriate SAM splint size and shape for the injured limb. SAM splints are available in multiple sizes suitable for fingers, hands, forearms, and long bones. Mold the splint along the injured extremity or use the uninjured limb as a reference. Proper alignment ensures the limb is immobilized in a functional or neutral position, preventing excess flexion, extension, or rotation that could worsen the fracture.
After shaping, carefully apply the SAM splint to the injured limb. Secure it using elastic wraps or straps provided by FlareSyn, starting from distal to proximal. Ensure wrapping is snug but does not impede circulation. Check the PMS status frequently to confirm that the splint has not compromised neurovascular integrity. Adjust padding or wrap tension as necessary. Once applied, elevate the limb if appropriate and provide support during transport.
Curves and Configurations for Different Fracture Types
The strength of a SAM splint comes from geometry and curvature. Understanding the curves allows responders to provide rigid support while keeping the splint lightweight and adaptable.
C-Curve
The C-Curve is the basic configuration that provides general rigidity for most upper and lower extremity fractures. It is created by bending the SAM splint into a gentle arc along its length. This curve is suitable for forearm fractures, wrist injuries, and finger immobilization, giving adequate support without adding bulk.
Reverse C-Curve
For larger or heavier limbs, such as the mid-shaft femur or tibia, the Reverse C-Curve adds reinforcement. The aluminum core is bent in the opposite direction to increase the moment of inertia, providing enhanced resistance to bending forces. This configuration is ideal when immobilizing long bones under stress or during transport.
T-Curve
The T-Curve offers maximum support for severe fractures, such as femur or knee injuries. The T-Curve configuration spreads the load across a wider surface area and resists twisting, making it perfect for pre-hospital stabilization and tactical field applications.
When combined with wraps and padding, it ensures stability while minimizing soft tissue compression.
Double-long and Specialty Configurations
For complex lower extremity injuries, double-long SAM splints can be used to cover the tibia and fibula simultaneously. Specialty configurations like sugar-tong splints immobilize the wrist and forearm while maintaining proper alignment. For thumb or scaphoid injuries, thumb spica configurations provide support and restrict movement to prevent further displacement.
SAM Splint Configurations and Recommended Uses
|
Curve / Configuration |
Typical Fracture Application |
Key Notes |
|
C-Curve |
Fingers, forearm, wrist |
Basic rigidity, easy to mold |
|
Reverse C-Curve |
Femur, tibia |
Reinforced for heavier limbs |
|
T-Curve |
Knee, femur |
Maximum support, prevents twisting |
|
Sugar-Tong |
Wrist, distal forearm |
Maintains neutral alignment |
|
Thumb Spica |
Thumb, scaphoid |
Limits motion, protects ligament injuries |
|
Double-long |
Tibia & fibula |
Immobilizes full lower leg |
Neurovascular Assessment and PMS Checks
Every SAM splint application must preserve circulation and nerve function. Begin with distal pulse evaluation before applying the splint. Monitor motor function (can the patient move toes, fingers, or flex joints?) and sensory perception (can they feel touch or temperature?). Repeat these checks after applying the splint and during transport.
Any loss of pulse, increasing numbness, tingling, or discoloration is a warning sign that the splint may be too tight, misaligned, or causing secondary injury. Adjust the wrap or padding immediately and reassess PMS. Proper training with SAM splints includes regular neurovascular monitoring, ensuring early detection of complications such as compartment syndrome or vascular compromise.
Advanced Tips for Tactical, Field, and Workplace Applications
SAM splints are used in diverse environments, including emergency response, tactical operations, industrial safety, and outdoor sports. In tactical scenarios, the splint must integrate with MARCH algorithms (Massive hemorrhage, Airway, Respiration, Circulation, Hypothermia) and CUF (Care Under Fire) protocols. In workplace environments, quick stabilization can prevent secondary injuries and allow safe transport to medical facilities.
Field considerations include:
-
Radiolucency: FlareSyn SAM splints allow X-rays without removal
-
Waterproofing and cleaning: Essential for outdoor or wet conditions
-
Temperature resistance: Effective in extreme cold or heat
-
Compact storage: Multiple sizes fit into IFAK or first-aid kits for rapid access
-
Multi-use potential: Can act as improvised splints, paddles, or supports when needed
Securing the SAM Splint With Wraps
A SAM splint works best when it is shaped correctly and secured evenly. wraps can help hold the splint in place without creating hard pressure points. Wrap from the far end of the limb inward, but do not wrap directly over the most painful fracture point if it causes pressure. Each layer should overlap smoothly, and the wrap should be firm enough to prevent movement but loose enough to allow normal circulation.
After wrapping, check the skin below the splint. Fingers or toes should stay warm and pink, and the patient should still feel touch and move the digits if the injury allows. If numbness, tingling, severe swelling, or color change develops, loosen the wrap and reassess. Splinting is not a one-time action; it requires repeated checks during transport or while waiting for medical help.
Common SAM Splint Mistakes to Avoid
The most common mistake is applying a splint without checking PMS: Pulse, Motor, Sensory before and after. Without this baseline, it is hard to know whether the injury worsened or the splint caused pressure. Another mistake is splinting too loosely, which allows the fracture to move and increases pain. Splinting too tightly can be just as dangerous because it may restrict blood flow.
Avoid these errors:
|
Mistake |
Why It Matters |
Safer Approach |
|
No neurovascular check |
Missed circulation or nerve issue |
Check pulse, movement, sensation before and after |
|
Too little padding |
Pressure sores and skin injury |
Pad bony areas and swollen tissue |
|
Forcing alignment |
Can worsen fracture or tissue damage |
Splint in position found unless trained care directs otherwise |
|
Wrap too tight |
Numbness, swelling, vascular compromise |
Keep wrap snug, not restrictive |
|
Covering fingers/toes fully |
Hard to monitor circulation |
Leave digits visible when possible |
Care, Cleaning, and Maintenance
A SAM splint should be inspected after use, especially if it has been bent sharply, cut, exposed to fluids, or used in rough field conditions. Follow the product’s Instructions for Use (IFU), Care & Maintenance guide, and MR Safety Information where relevant. Clean and disinfect the splint according to approved guidance before reuse. If the aluminum core is cracked, the foam is damaged, or the splint no longer holds shape properly, replace it.
For workplace kits, IFAKs, and emergency response bags, check splints and wraps during routine kit inspections. A splint that is missing, damaged, or buried under supplies slows response time. FlareSyn trauma kits can help keep splints, wraps, gloves, dressings, and trauma shears organized for fast access in real emergencies.
When to Seek Professional Medical Care
A SAM splint is a first-aid and pre-hospital stabilization tool. It does not replace medical diagnosis, imaging, or fracture treatment. Seek urgent medical care for open fractures, severe deformity, uncontrolled bleeding, loss of pulse, numbness, blue or pale skin, severe pain, or inability to move the extremity. Also seek care after high-energy trauma, roadside injury, fall from height, suspected pelvic fracture, femur fracture, cervical trauma, or any injury involving head, chest, or abdominal trauma.
Warning signs such as increasing pain after splinting, tight swelling, numbness, weakness, or worsening color may suggest vascular compromise or compartment syndrome. These signs require emergency evaluation.
FAQs About SAM Splint Application
What is a SAM splint used for?
A SAM splint is used to immobilize suspected fractures, sprains, dislocations, and soft tissue injuries before medical care. It can support fingers, wrists, forearms, elbows, ankles, knees, and other extremity injuries when shaped and secured correctly.
How do you make a SAM splint stronger?
A SAM splint becomes stronger when shaped into curves. A flat splint is flexible, but a C-Curve, Reverse C-Curve, or T-Curve increases rigidity and helps the splint resist bending during transport.
Should you check circulation before or after splinting?
Check circulation, sensation, and movement before splinting, after splinting, and during transport. This helps identify nerve or blood flow problems early.
Can a SAM splint be used for lower extremity fractures?
Yes, it can be used for ankle, foot, tibia, fibula, and some knee support situations. For major femur fractures, it may provide temporary support, but trained medical care is needed quickly.
Can you reuse a SAM splint?
Many SAM splints can be reused if they are cleaned, disinfected, inspected, and still structurally sound. Follow the IFU and care guide. Replace any splint that is cracked, damaged, contaminated beyond safe cleaning, or no longer holds shape.
Final Thought
SAM splint application is a practical skill for first responders, workplace safety teams, tactical users, outdoor groups, and anyone responsible for emergency readiness. The key is not just having a splint, but knowing how to assess the injury, shape the splint, protect the skin, secure it correctly, and recheck neurovascular status. A well-applied splint can reduce pain, limit movement, protect soft tissue, and make transport safer.
For emergency kits, IFAKs, and workplace trauma stations, FlareSyn SAM splints, finger splints, elastic wraps, trauma shears, and trauma care supplies give responders the tools needed to act quickly and safely. Keep them accessible, train your team, and review splinting steps regularly so the equipment is ready when a real injury happens.
